React Components Testing with Jest & Enzyme
by Alyona Pysarenko

React Components Testing with Jest & Enzyme
by Alyona Pysarenko
Agenda
- Introduction to Jest and Enzyme
- Define the correct order of components’ testing based on project structure
- Find what to omit in test coverage
- Identify the necessity of Snapshot Testing
- Define what to test in the component and in which order
- Provide detailed code examples
Introduction
to Jest
Jest is used by Facebook to test all JavaScript code including React applications.
Why Jest:
- Fast and sandboxed
- Built-in code coverage reports
- Zero configuration
- Powerful mocking library
- Snapshot Testing
- Works with TypeScript
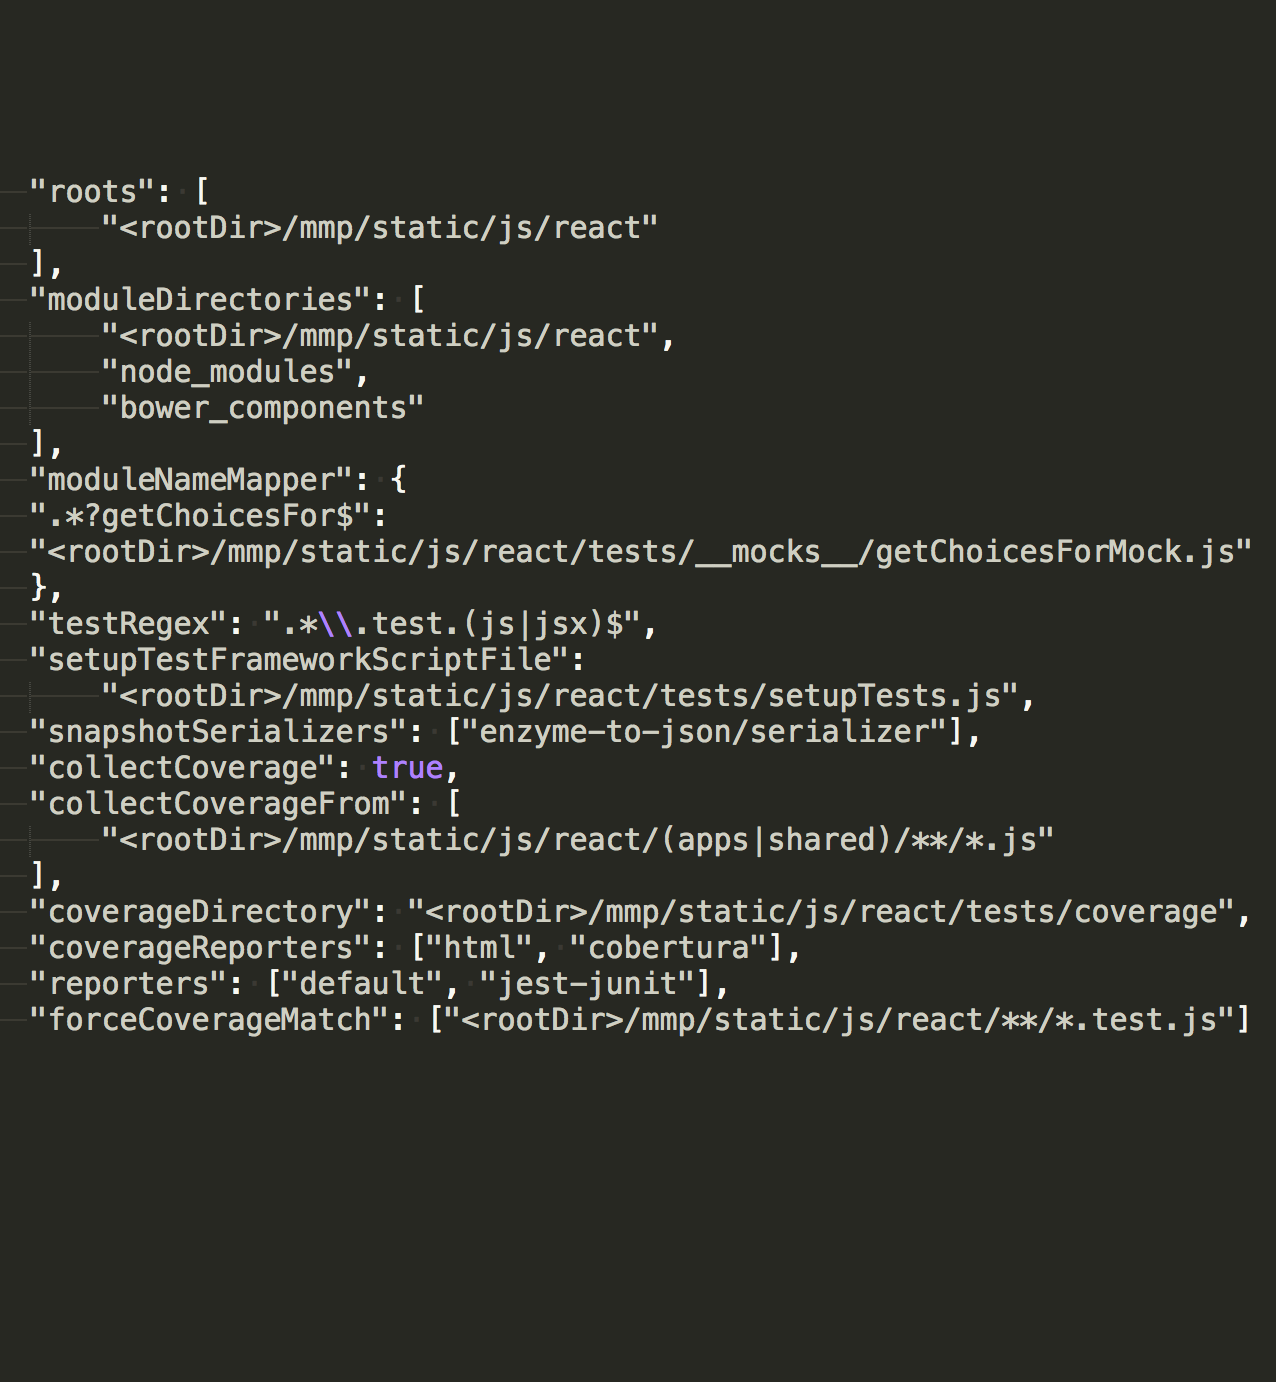
How to run tests
yarn test
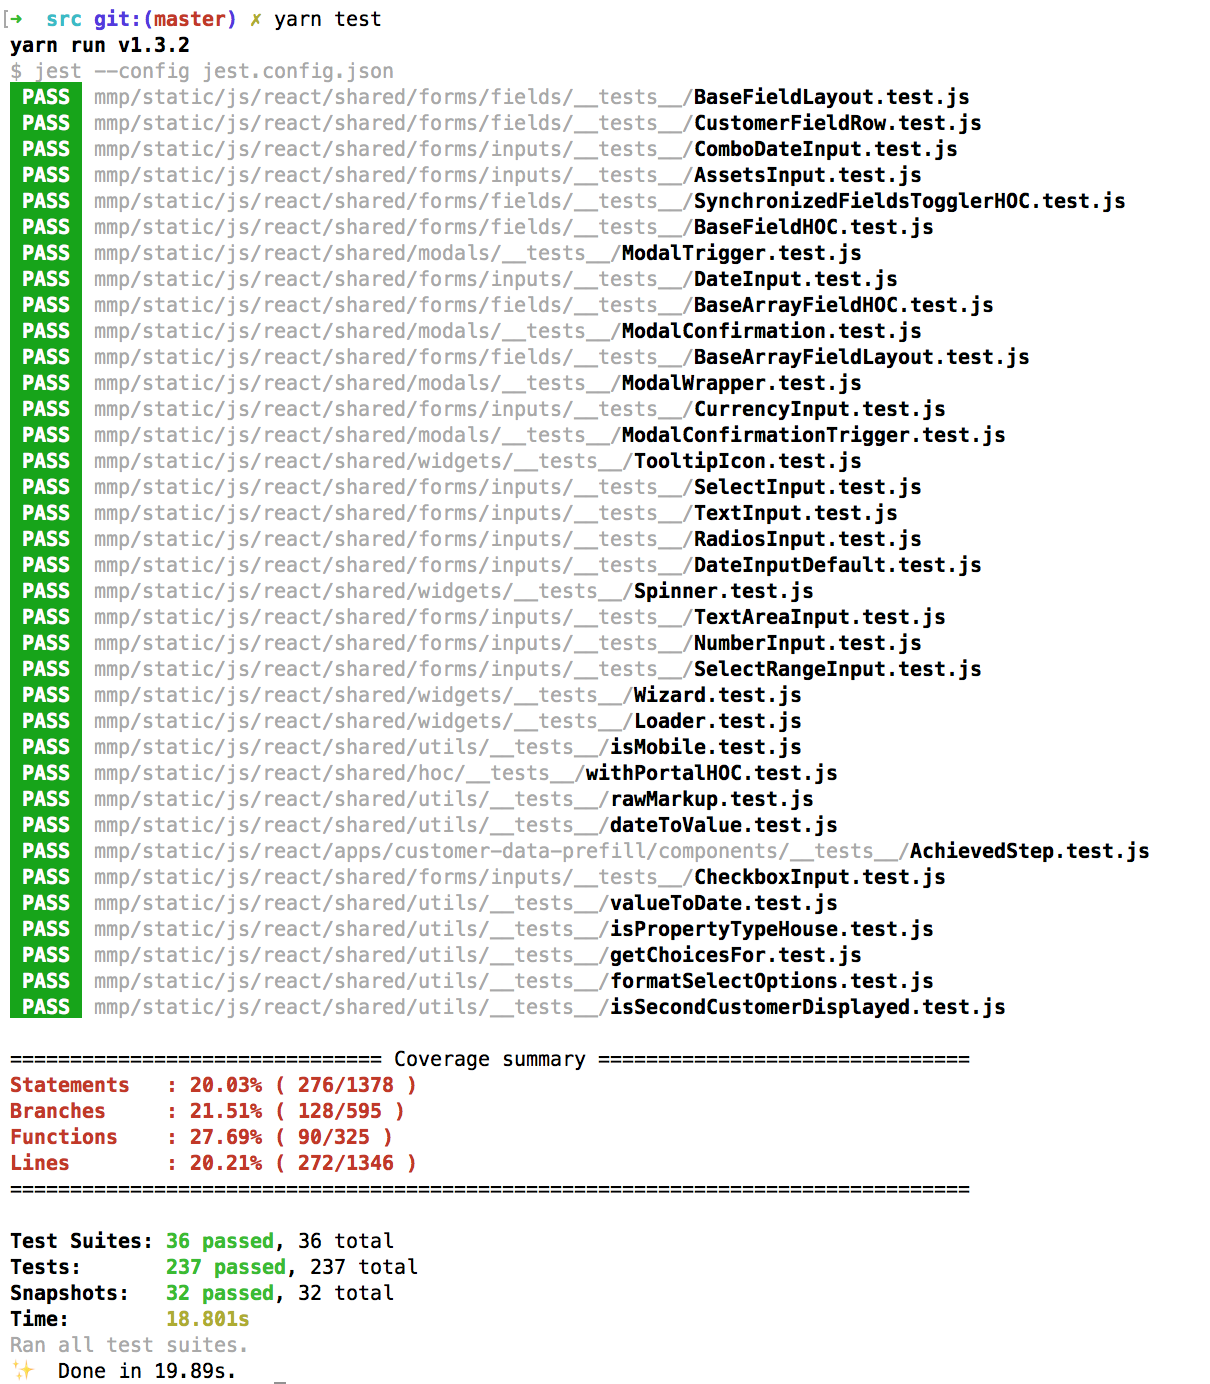
How to verify results
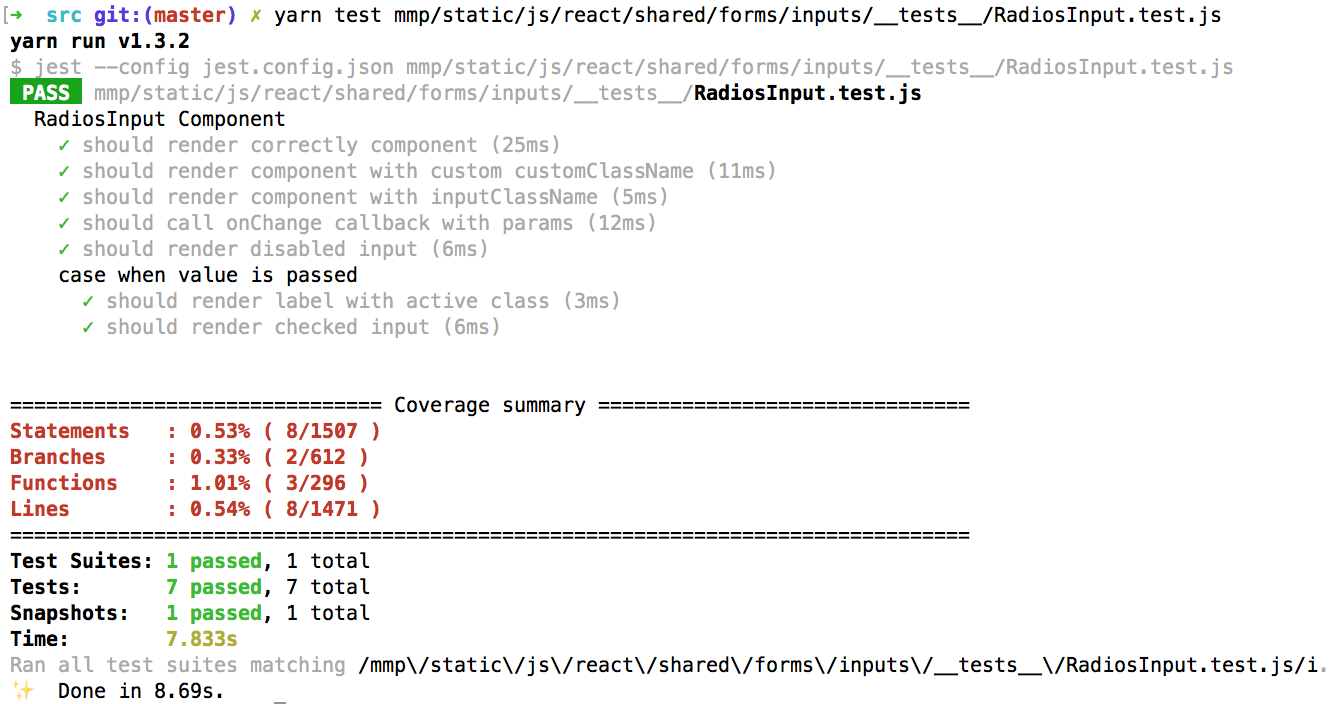
yarn test mmp/static/js/react/shared/forms/inputs/__tests__/RadiosInput.test.js
Success
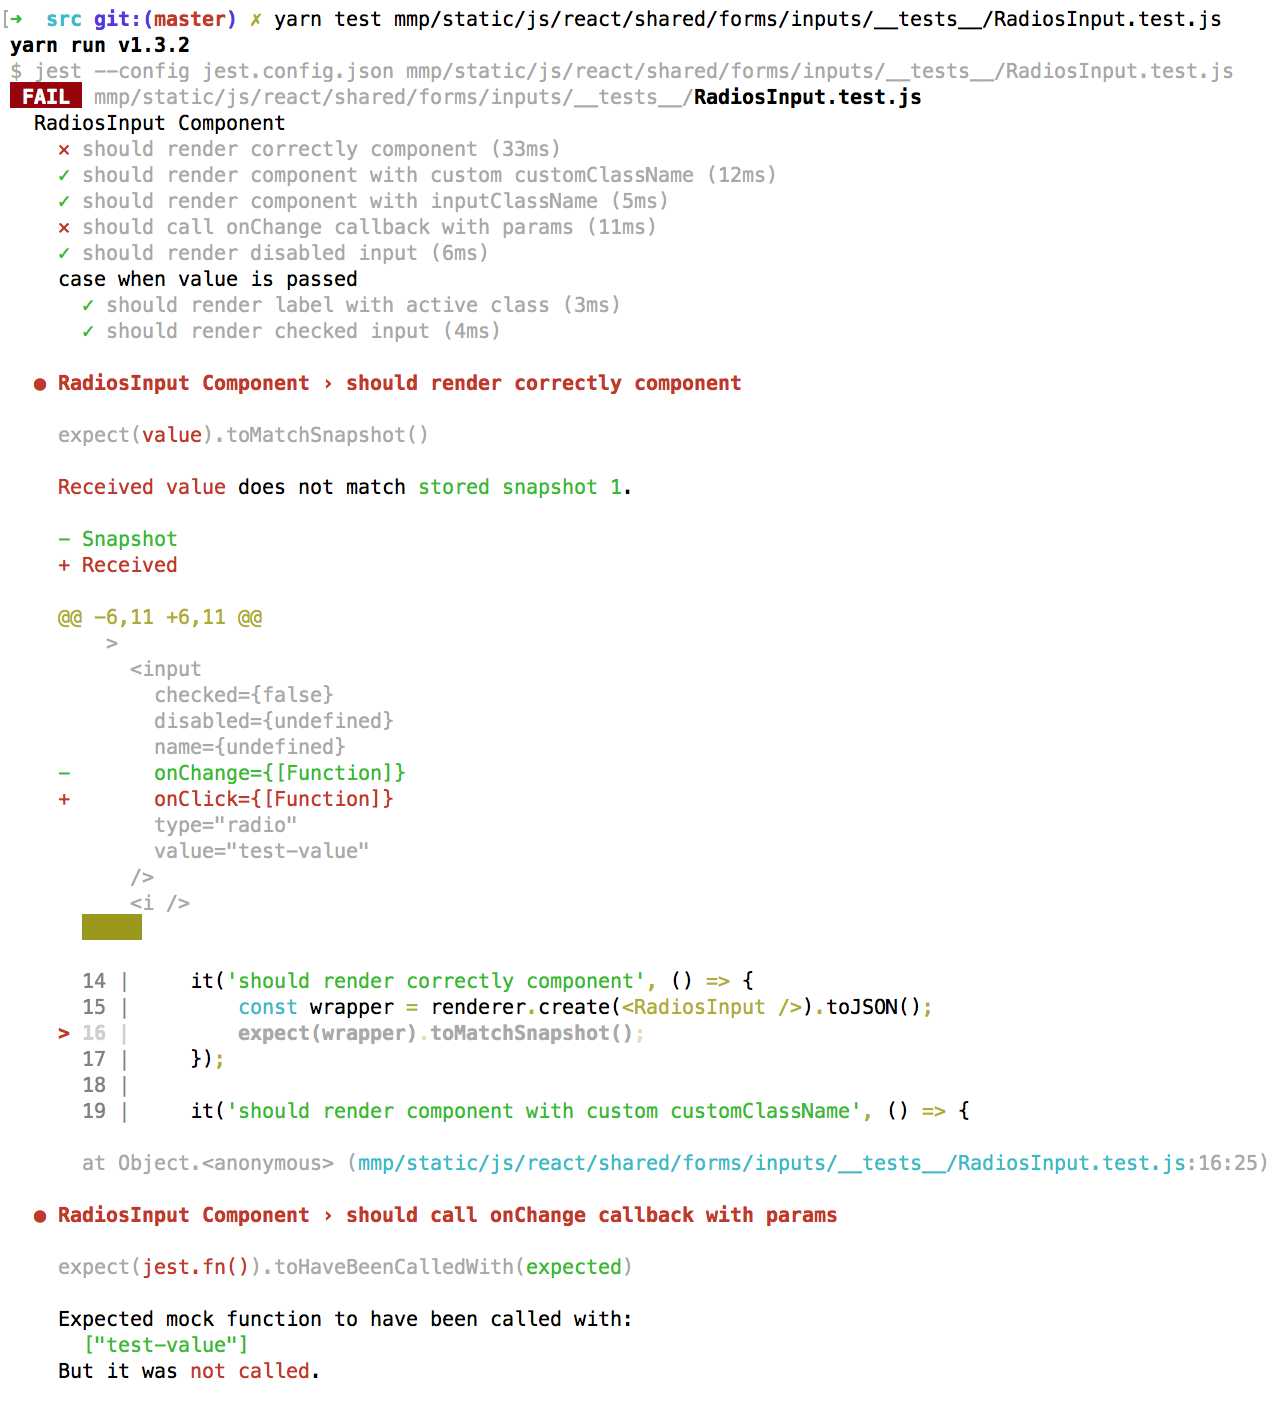
Failed
Enzyme
Enzyme is JavaScript Testing utilities for React
Basic Usage
- Shallow Rendering
- Full DOM Rendering
- Static Rendered Markup
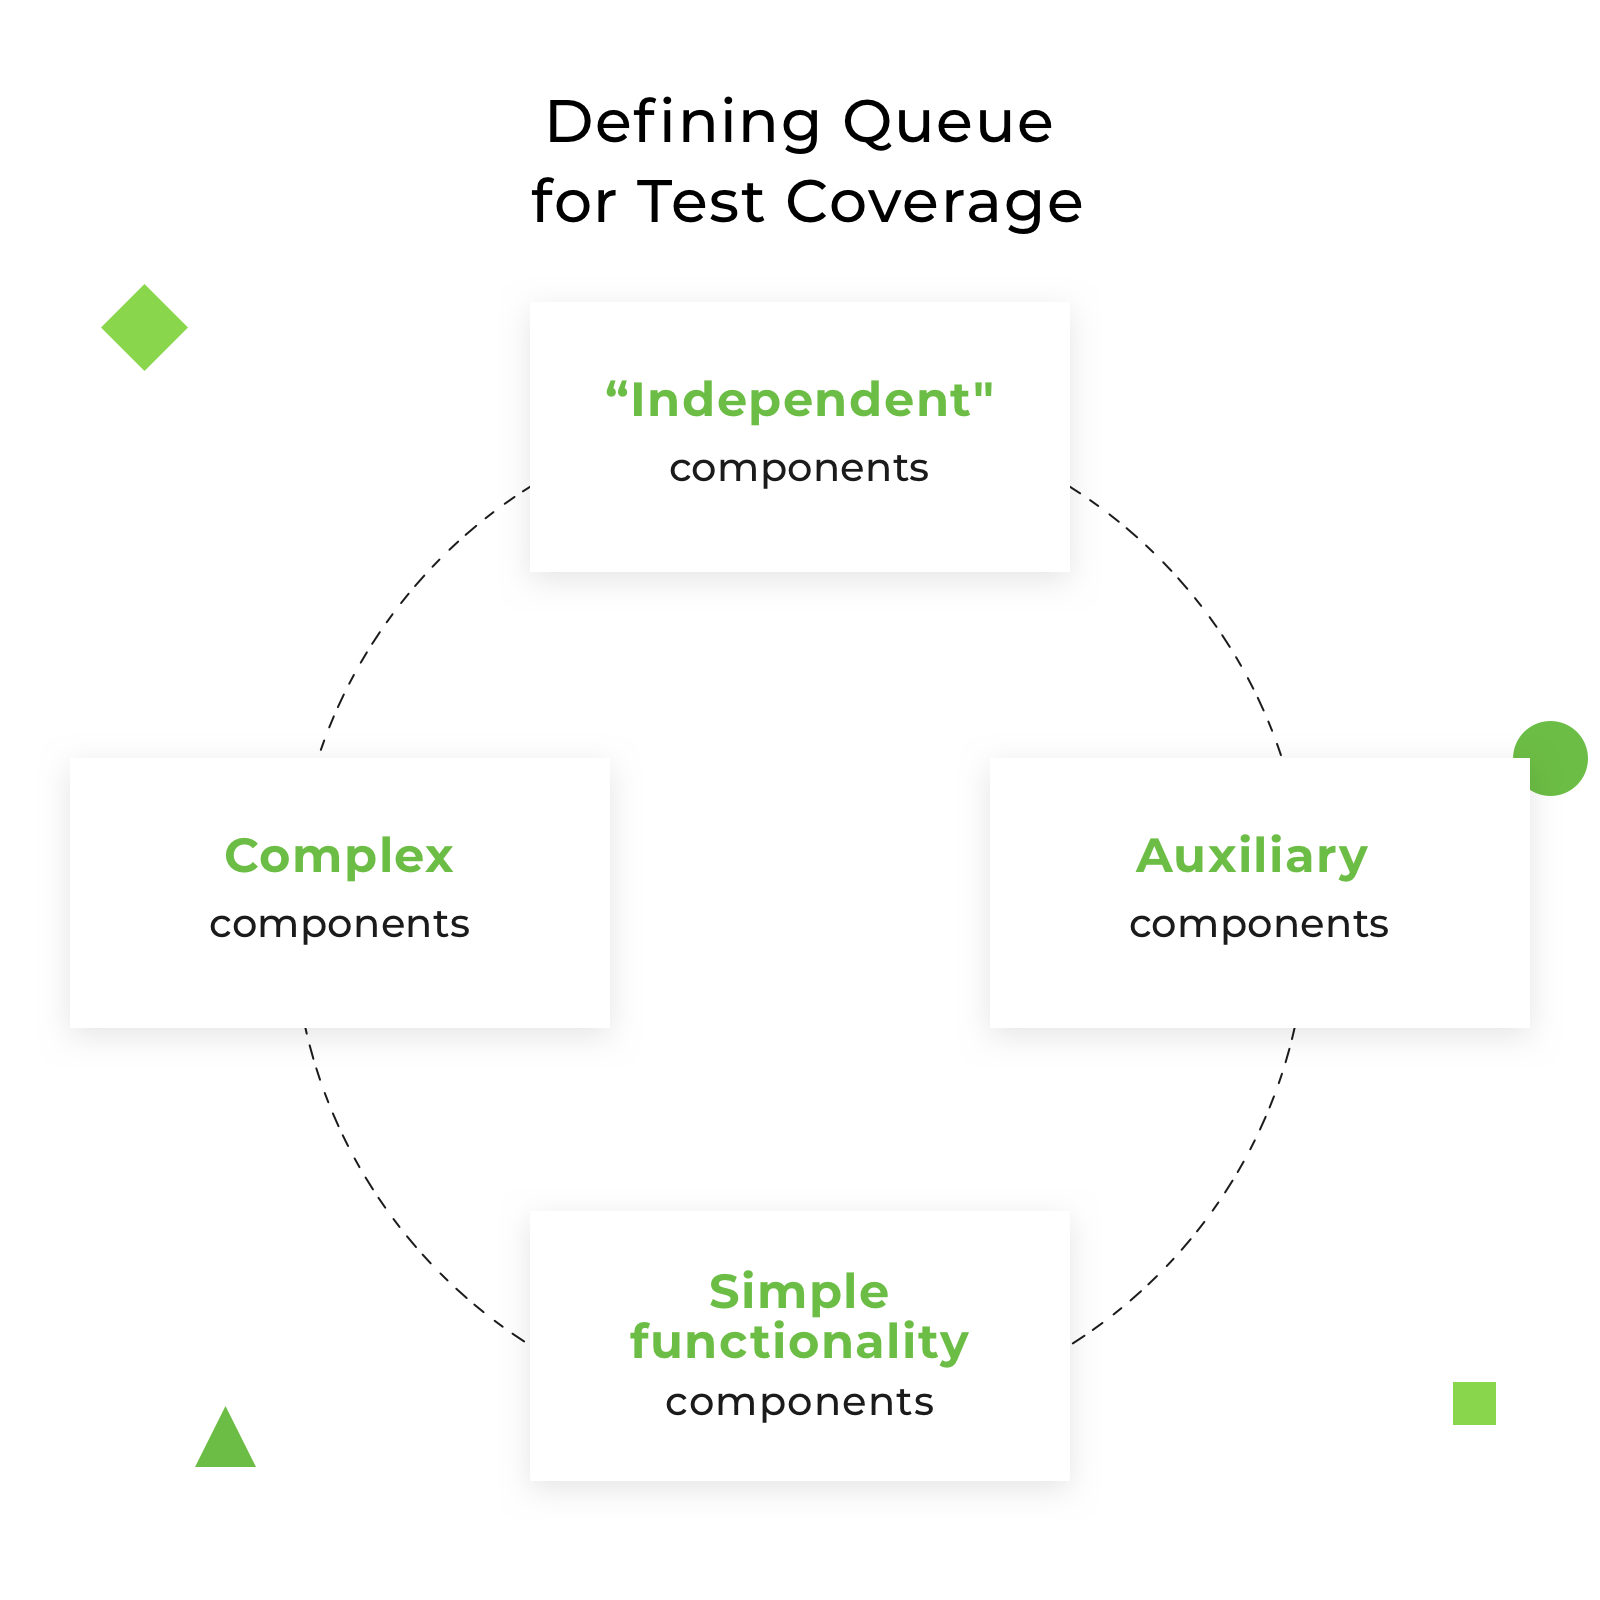
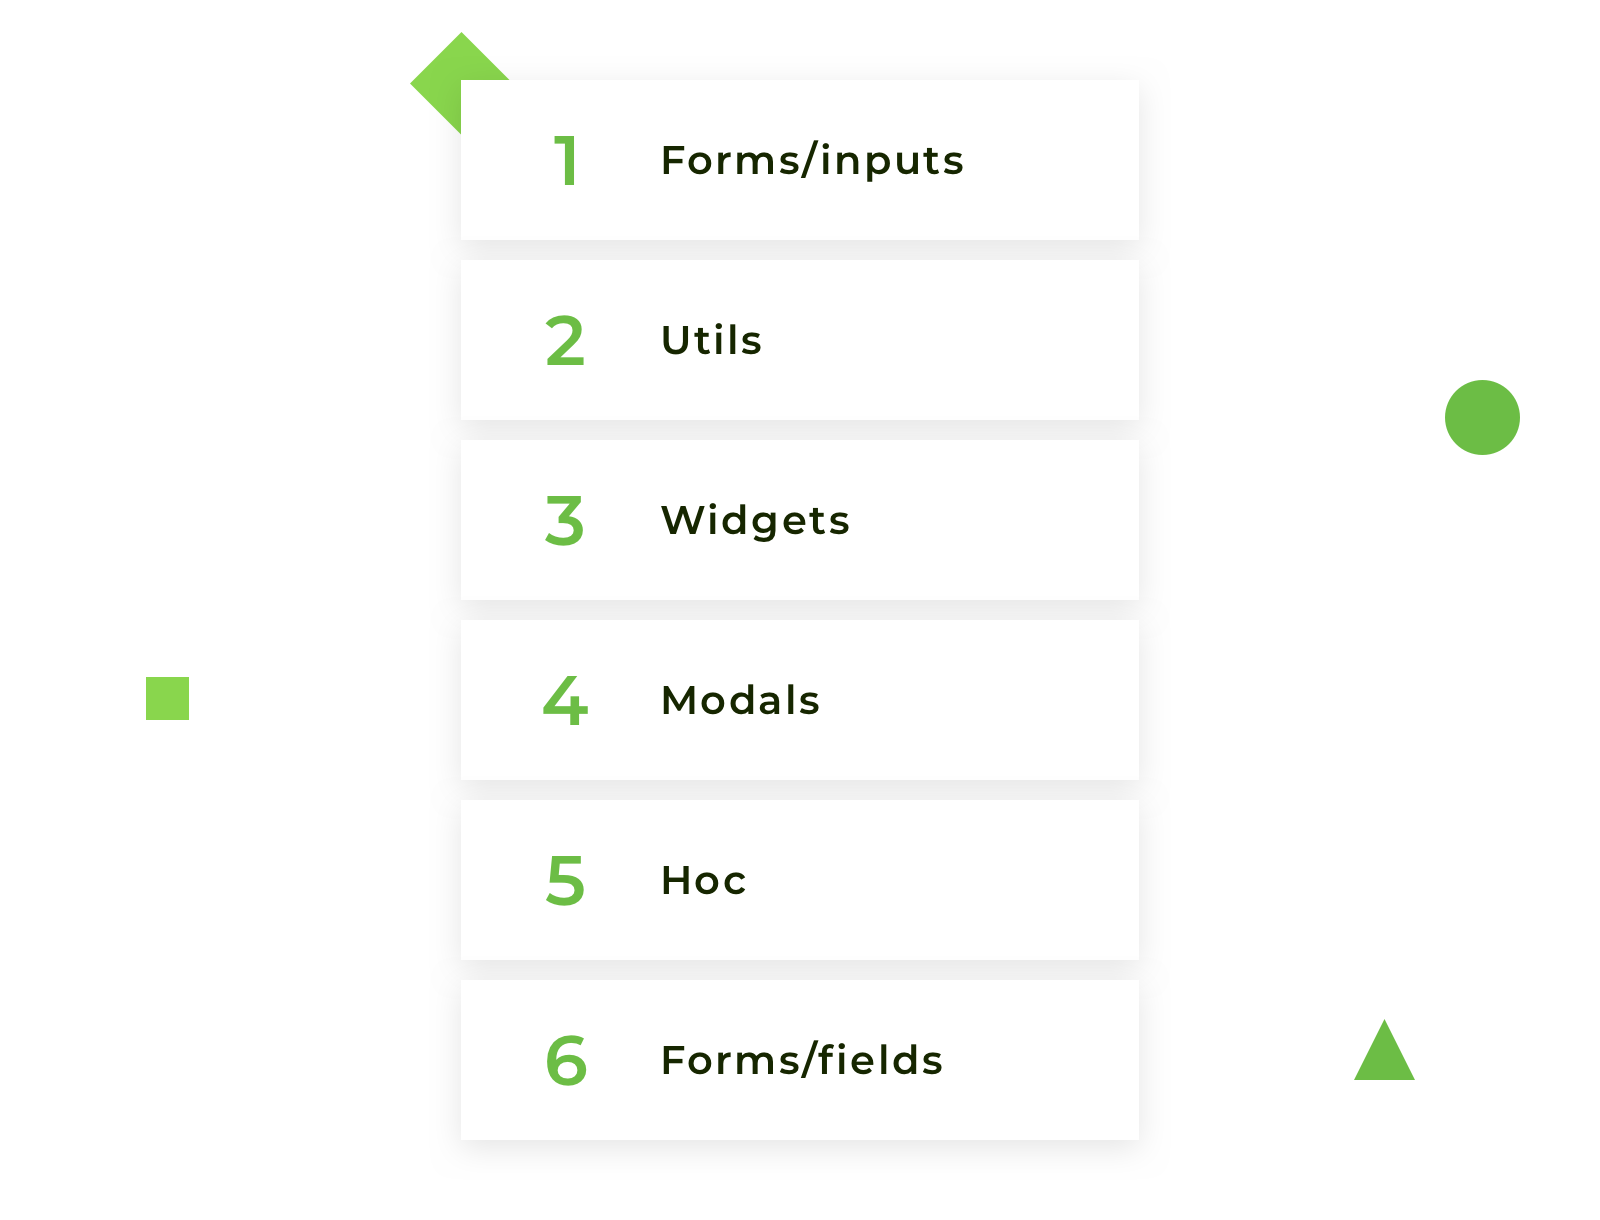
Define the correct order of components’ testing based on project structure
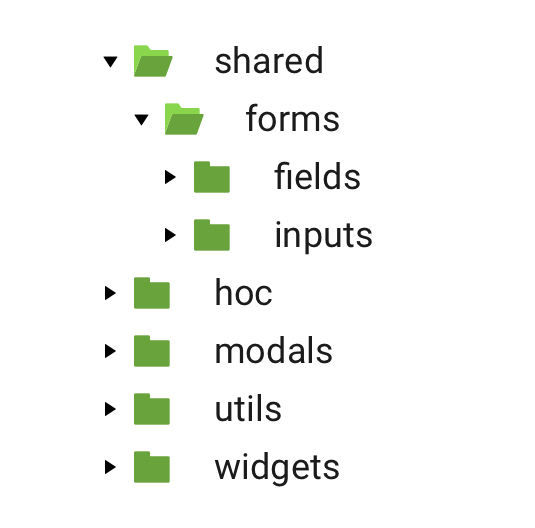
The final components order
What should be omitted in test
coverage:
- third-party libraries
- constants
- inline styles
- things not related to the tested component
Combine two testing approaches:
- Snapshot Testing
Capture snapshots of React trees to simplify testing and to analyze how state changes over time.
- Component logic testing
How to test with snapshots
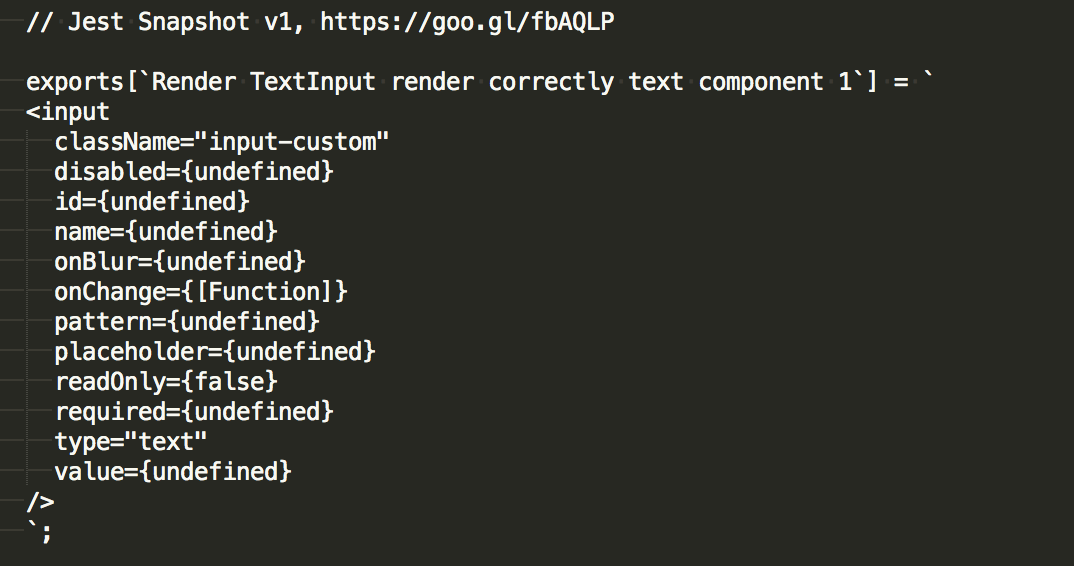
Step 1. Use the .toMatchSnapshot() method in expect block to create the Snapshot itself:

Step 2. Create directory __snapshots__ after first run containing autogenerated file with the extension .snap.
Snapshot view:
Step 3. Push the snapshot into the repository and store it along
with the test.
If the component has been changed, you just need to update the snapshot with —updateSnapshot flag or use the short form u flag.
How snapshot works
1. The component has changed
- Run tests
- New snapshot is created, it compares with the stored snapshot
- Tests failed because snapshot is different
How snapshot works
2. The component has not changed
- Run tests
- New snapshot is created, it compares with the stored snapshot
- Tests passed because snapshot is identical
Main instructions for component
testing:
- One snapshot per component
- Testing props
- Testing data types
- Events testing
- Testing conditions
- Testing state
Examples of Testing
1. Testing DateInput component
Code listing on github: DateInput.js
The DateInput component uses the library react-datepicker, with two utilities:
- valueToDate (converts value to date)
- dateToValue (converts date to value)
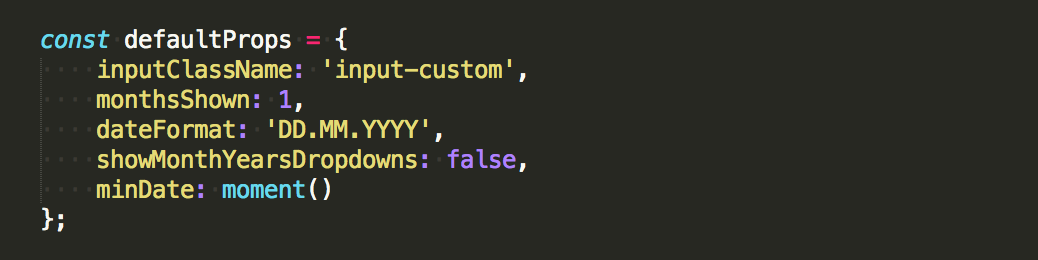
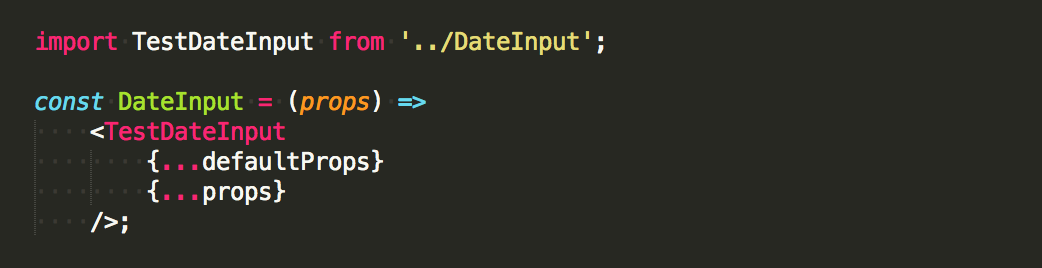
List of default props for component rendering:
Mock date value:

Create HOC to pass defaultProps
Remember about moment-timezone

Make component wrapper before each test

Now the date input component is ready for testing:
1. Create snapshot first:

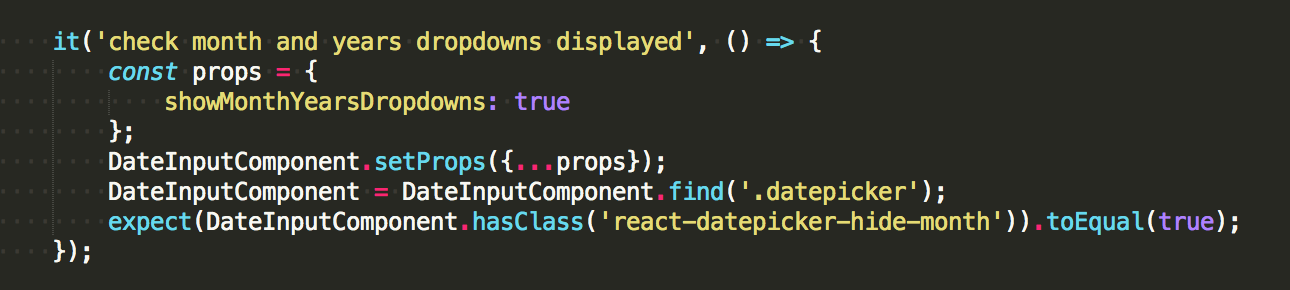
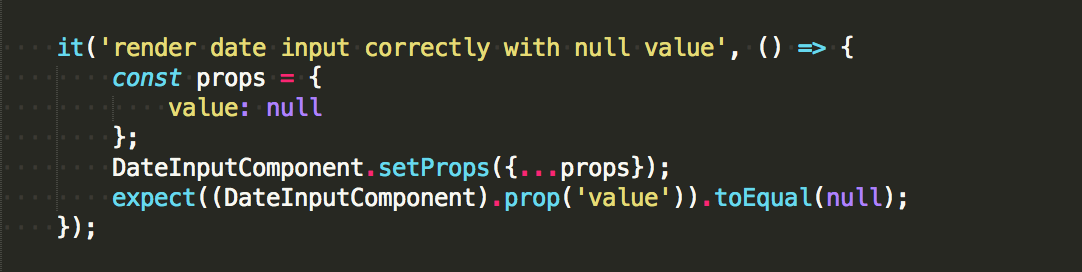
2. Testing props:
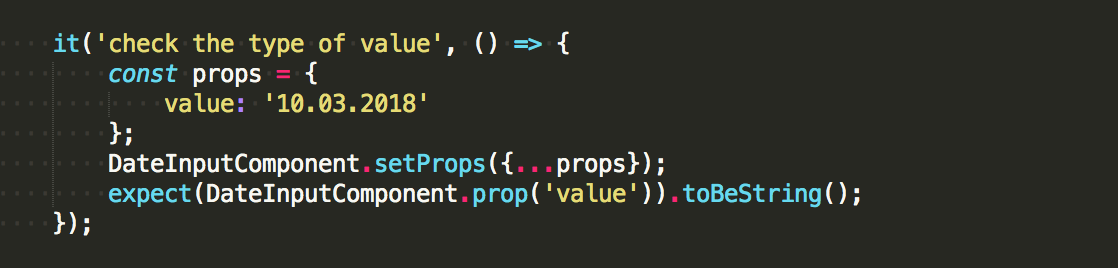
3. Test proptypes for value, date expected to be string:
4. Test events:
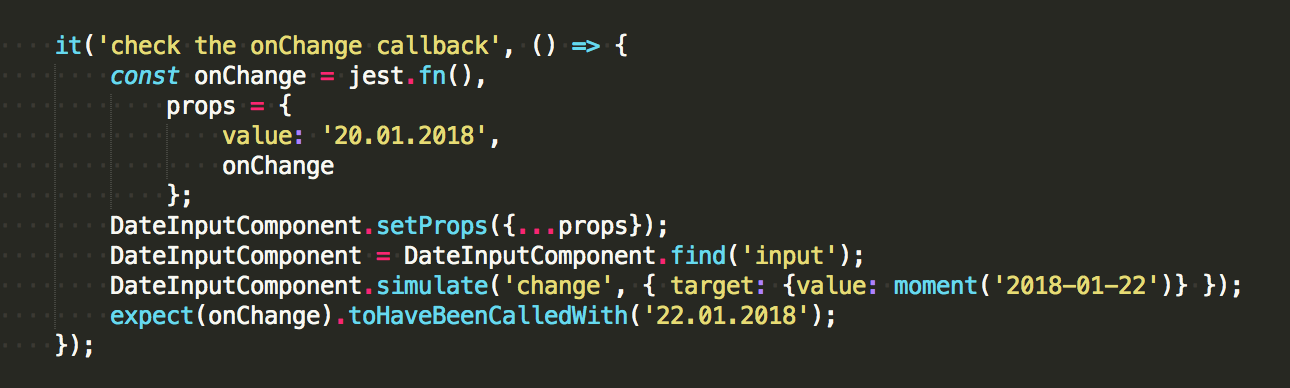
First, check the onChange event.
- mock onChange callback and setProps
- simulate change event with new target value
- check that onChange event has been called with new value
Ensure that the datepicker popup opens after a click on the date input

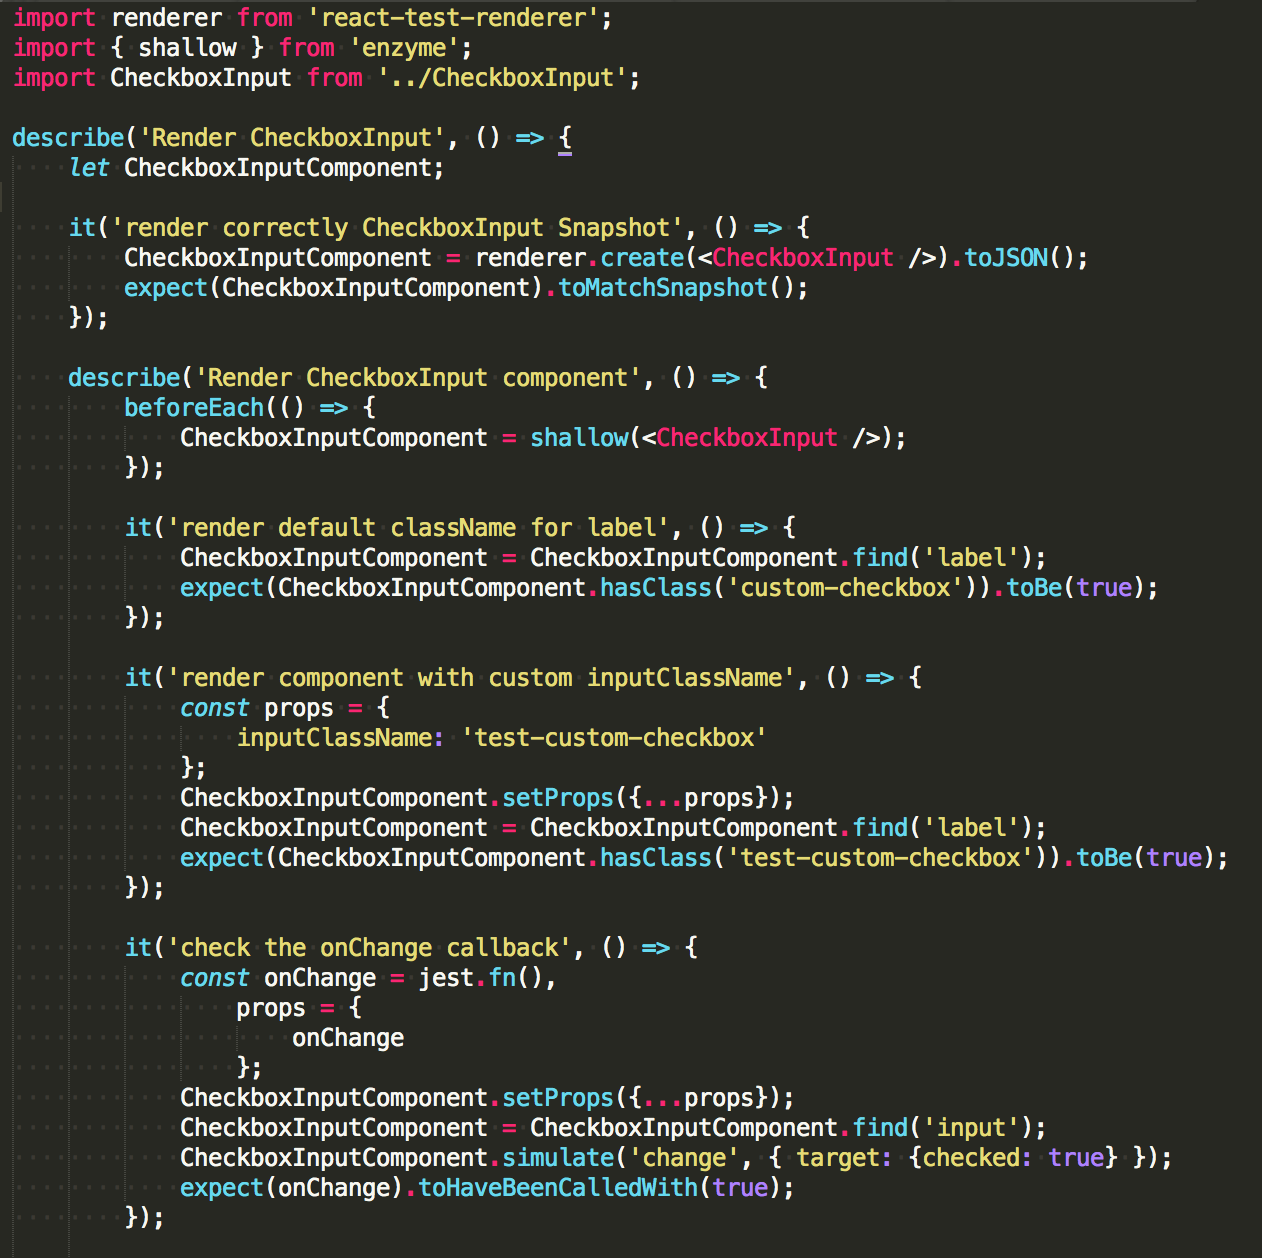
Full tests listing: DateInput.test.js
2. HOC testing (Higher-Order Component)
BaseFieldLayout:
- is wrapper for the form components like TextInput, CheckboxInput, etc.
- creates component layout (rendering labels, tooltips, icons, errors, ...)
- is used in BaseFieldHOC for wrapping the inputComponent and redux-form `Field` component
Code listing for tested component: BaseFieldHOC.js
Analyzing the HOC:
- receives only one prop
component:
- need to create this component
- wrap it in the BaseFieldHOC
- decorate the wrapped HOC with redux-form
- render field inside redux `Provider` component to make the store available
To mock the store, just do: const store = createStore(() => ({}));
Before each test do:
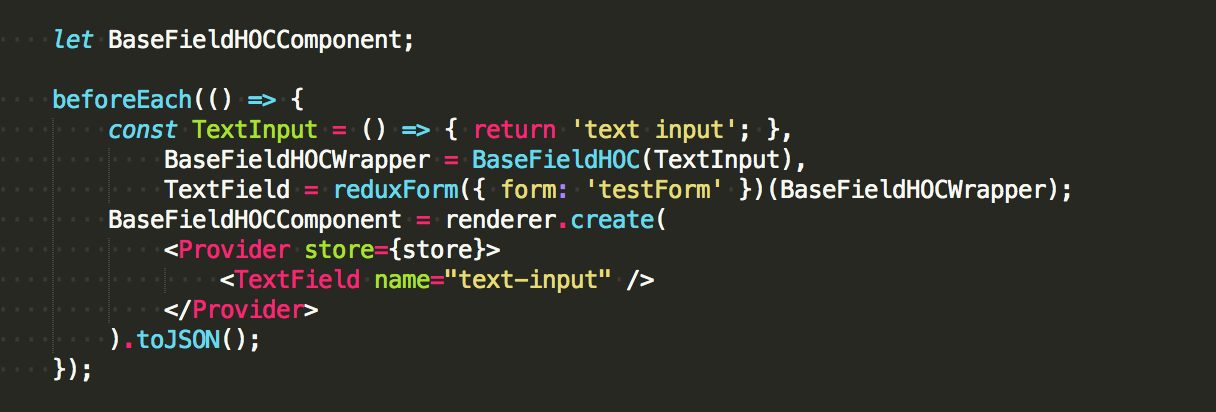
1. Create snapshot:

2. Ensure that the input component is wrapped in BaseFieldLayout after rendering:

Full tests listing: BaseFieldHOC.test.js
Test coverage
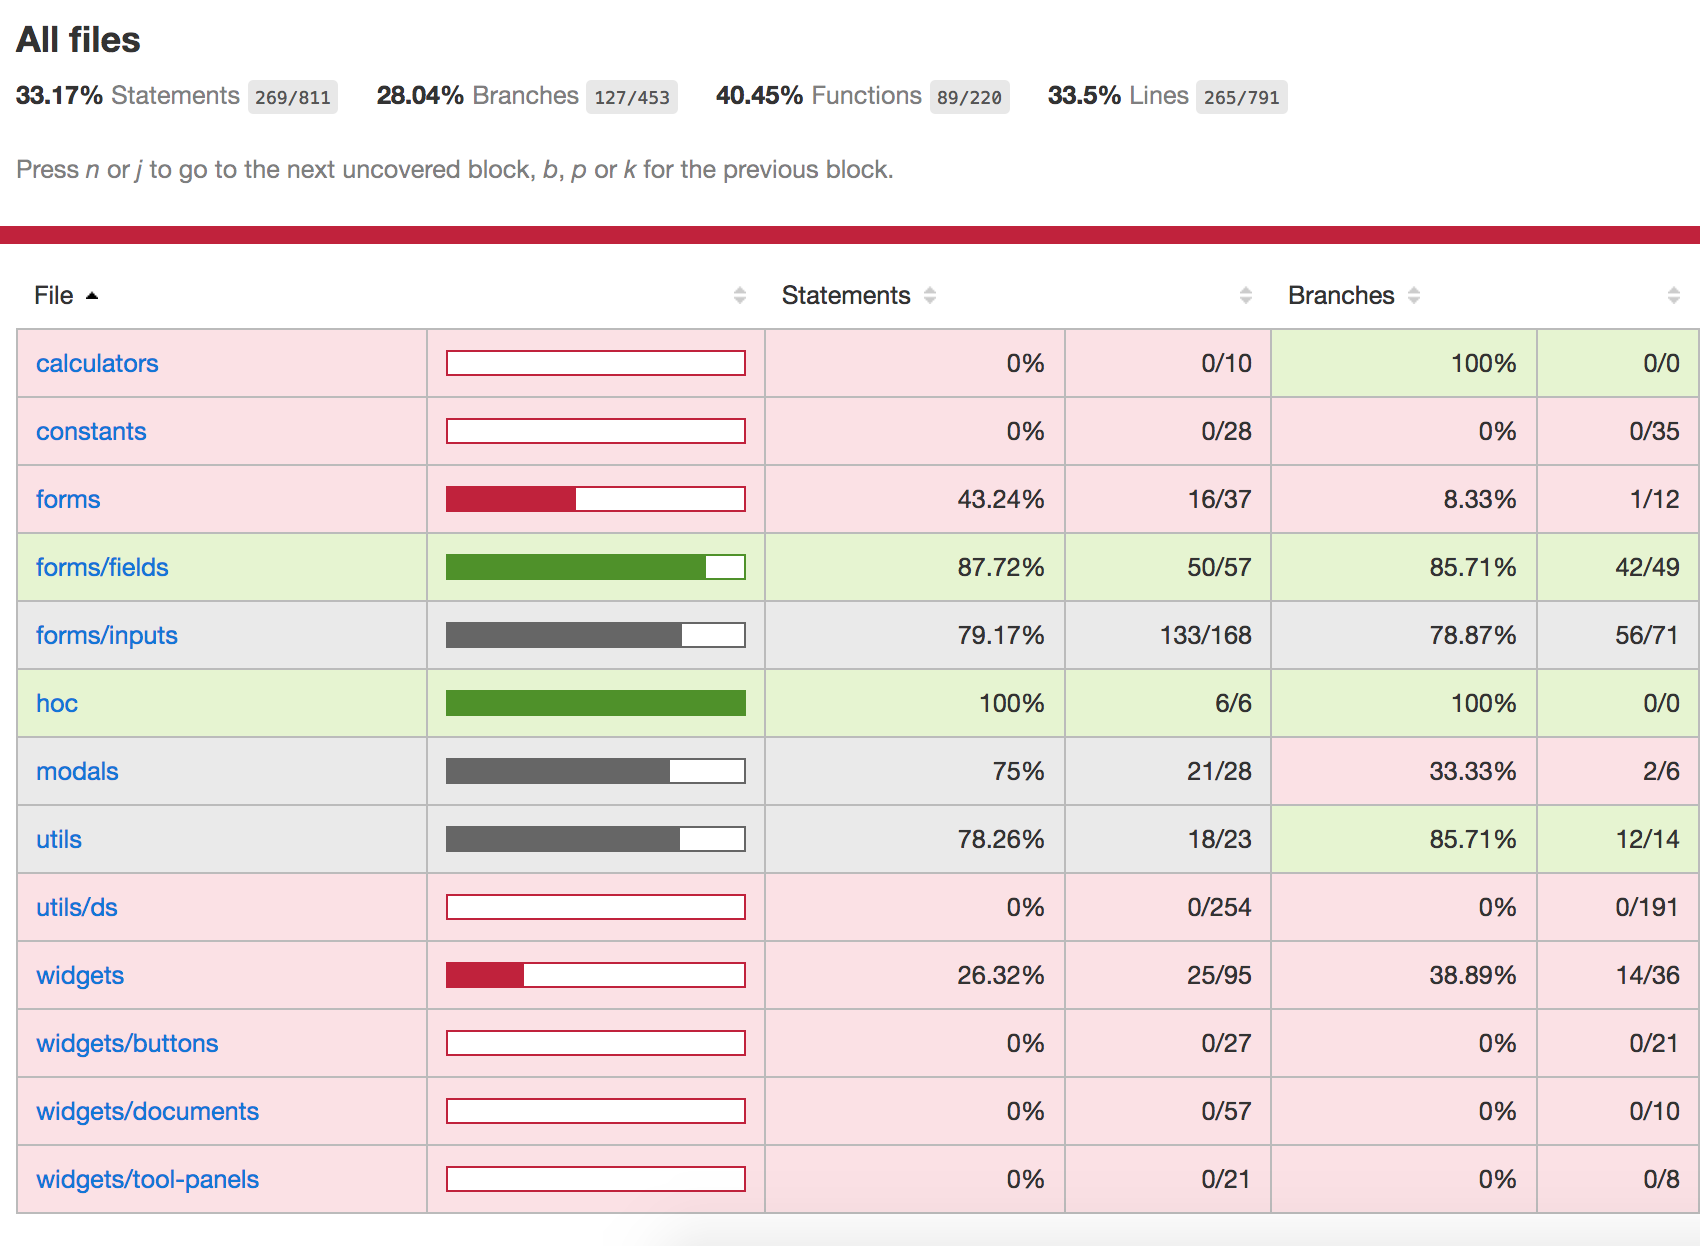
Test coverage
Thank you for your attention!